The Hole Comes First: A Buttonhole Health Check for Home Sewists
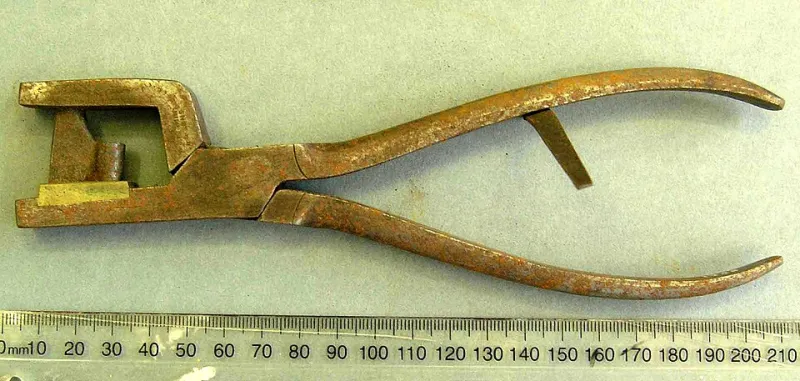
Photo: Unknown, CC BY 4.0, via Wikimedia Commons
A button takes a lot of blame. It pops off in a car park, it works loose on a winter coat, and the button gets called unreliable. Usually the button was innocent. It left because the hole it lived in had already given up — stretched, frayed, or cut a millimetre too generously in the first place and quietly widening ever since.
If you sew for yourself, for a family, or for a stall, the buttonhole is the part of the fastening worth obsessing over. It is also the part most of us sew last, in a hurry, on the finished garment, with the iron already cooling.
Why holes fail before buttons do
A buttonhole is a slot cut through fabric, and fabric hates a slot. Every time the garment is fastened, the edges of that slot take a small load. If the cloth around it isn't supported — no interfacing, too light an interfacing, an interfacing that has bubbled off after three washes — the fibres gradually separate. The hole grows. The button, now with room to travel, works its stitches loose. Two failures, one cause.
There are four usual culprits: insufficient stabiliser, a hole cut too long, a stitch density too loose at the ends, and a button matched to the hole by eye rather than by measurement.
The three-number rule for length
Don't guess. Measure the button across its widest point, measure its thickness, and add a small allowance for the fabric it has to pass through. In practice:
Buttonhole length = button diameter + button thickness + 2–3mm
A 15mm button that sits 3mm proud wants a hole of about 20mm. A chunky coat button at 25mm and 6mm thick wants close to 33mm. Write the numbers down before you thread the machine — guessing at the machine is how you end up with a hole you can post a letter through.
There's a reason to err short rather than long. A hole that's a whisker tight can be eased with a press and a couple of patient minutes. A hole that's too long can't be un-cut, only disguised.
Sew the sample, then be unkind to it
Every buttonhole should be tested on a scrap first — same fabric, same interfacing, same number of layers, same thread, same machine settings. Then do the things a garment actually experiences:
- Button it and pull firmly, in several directions.
- Press it with steam, as you would the finished garment.
- Put the scrap in a pillowcase and wash it at 30°C with a normal load.
- Let it dry the way you'd dry the garment.
Then look at the ends. Are the bartacks intact? Has the fabric around the hole distorted? Can you see the interfacing lifting? Ten minutes of abuse on a scrap saves a coat.
What goes underneath matters more than the stitch
A beautiful buttonhole on unsupported cloth is decoration. What you fuse or lay behind it does the structural work.
| Garment | Shape | Stabiliser |
|---|---|---|
| Cotton shirt | Straight | Light fusible, cut on grain |
| Wool coat | Keyhole | Medium/heavy fusible plus a strip of organza |
| Knitted cardigan | Straight or keyhole | Knit interfacing, never woven |
| Fine lawn or silk | Straight, corded | Silk organza or fine cotton |
Fuse with a press cloth and pressure rather than a lot of steam, and let it cool flat before it moves. If you're working with a coating or a heavy tweed, a strip of organza behind the buttonhole band will do more for its lifespan than any amount of extra stitching.
Straight or keyhole?
Straight buttonholes are quick, neat and right for most light and medium fabrics — shirts, blouses, dresses, summer trousers. They suit flat buttons and low-strain fastenings.
Keyhole buttonholes have a small round eye at one end, and that eye is the clever bit: it takes the strain, allows a larger button through a shorter slot, and gives a coat something to pull against. Use them on wool, on heavy linen, on anything with a thick or domed button, and anywhere the fastening is under real tension.
For jersey, a standard buttonhole will ripple. Use a wider zigzag, a stretch setting if your machine has one, and cord the hole with a fine cord or heavy thread so it holds its shape rather than following the knit.
Rescuing a stretched hole
A hole that has opened up but hasn't torn can often be rebuilt. Fuse a small patch of lightweight interfacing behind it, then stitch a second, tighter row of buttonhole stitch around the existing slot, closing the gap by a millimetre or two on each side. Press, and let it cool.
If the cloth has thinned so much that stitching pulls through, don't fight it. Either add a backing button behind the visible one to redistribute the pull, or move the fastening a centimetre and a half up the placket, disguise the old hole with a tiny patch, and call it a design decision.
Rescuing a frayed or torn hole
- Frayed edges: run a thin bead of fray-stopping liquid around the rim, let it dry fully, then work a close blanket stitch by hand over the damaged section.
- Torn at one end: bind the end with a scrap of fine cotton, or work a round eye by hand — small buttonhole stitches radiating around an awl-punched hole.
- Split right through: turn it into a bound buttonhole in matching fabric, or re-site the button and pocket the old hole under an overlap.
A five-minute check before you wear it out
Fasten every button on the garment. Watch the holes as you do it. If an edge bulges, if you can see daylight between the stitches, if the cloth dimples around the slot, deal with it now. A hole is easy to shore up at the kitchen table and miserable to fix in a car park in the rain, which is where these things are always discovered.