When the Lamps Come On: Judging Buttons by Winter Light

Photo by Photo by Jason Leung on Unsplash on Unsplash
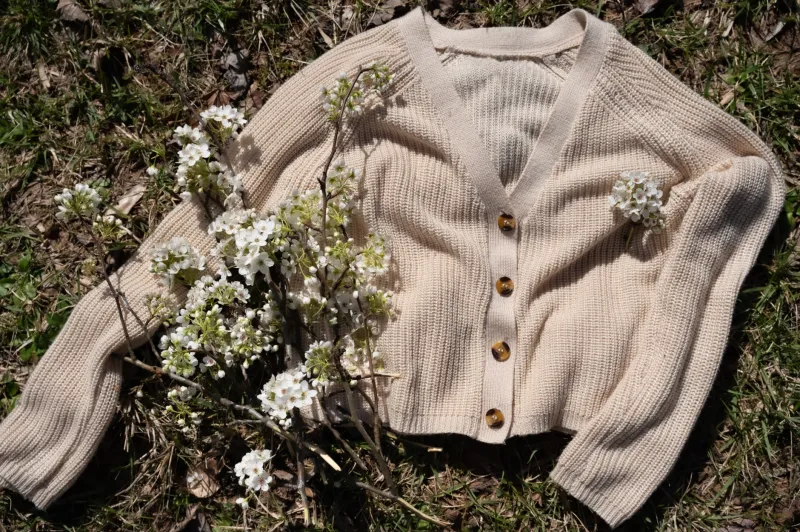
There is a particular moment in a British November, somewhere around ten to four, when the sky gives up and the kitchen lamp takes over. If you happen to be sitting at the table with a pile of buttons and a cardigan in need of rescue, you'll see it happen. The pearl buttons you chose so confidently at the shop that morning go slightly milky. The brass ones suddenly look almost orange. The dark horn ones disappear entirely against the wool.
Nothing has changed except the light. But light, for a button, is more or less the whole performance.
Why winter is the honest season for buttons
From roughly now until March, most of us do our button-looking in one of three conditions: a low, slanting sun that lasts about forty minutes; a warm indoor bulb; or a string of fairy lights doing decorative duty above a mantelpiece. None of these resemble the flat, neutral daylight of a haberdashery counter, which is where most of us make our choices.
That gap matters. Winter is when buttons get the most outings — festive knits, cosy coats, gifts wrapped and handed over — and it's also when the light is least forgiving. A button that reads as crisp and expensive in July can look like a sweet wrapper in December. And a button that looks plain on the shelf can come alive the moment a warm bulb catches it.
So before you commit needle to thread on anything you care about, it's worth doing a small, slightly nerdy, genuinely useful thing: testing your buttons in the light they'll live in.
What each family of buttons does after dark
A few broad behaviours, gathered from far too many evenings spent squinting at cards of stock:
Pearl and pearlescent. These are the great shape-shifters. Under cool daylight they throw a soft pinkish gleam; under a warm bulb the gleam goes creamy and can head towards yellow. Cheap pearl finishes sometimes lose their lustre entirely at close range under LED, going flat and slightly chalky. Good ones deepen. If you're making a gift, look at them from a metre away as well as up close — that's the distance a compliment comes from.
Metallic and gilt. Brass, gold-tone and silver-tone buttons pick up whatever is nearby and reflect it back. Near a warm lamp they glow handsomely; near a cool-white LED they can turn a steely grey. Antique finishes hold their character better than bright polished ones, which tend to read as bright spots rather than as buttons.
Horn, wood and corozo. These warm up rather than cool down. Under a lamp they go rich and chocolatey; in low winter sun they can look almost amber. The risk is contrast — dark horn on dark navy wool vanishes after dusk, and you lose the detail you paid for.
Glass and crystal. Genuinely magical under fairy lights, which is why they turn up on party knits. They also behave like tiny mirrors, so check what they'll be sitting next to. A clear glass button against a cream knit is elegant; the same button against a busy print is a ghost.
Plain dark plastic. Honest, reliable, and quietly dull after dark. If definition matters — a cardigan front, a coat placket — a rimmed or shanked button will hold its shape better than a flat disc when the light drops.
White and cream. These do the opposite of dark buttons: they glow. Under fairy lights a chalk-white button can read almost luminous, which is charming on a Christmas stocking and slightly alarming on a work cardigan.
Making a daylight-versus-lamplight card
This is a half-hour job and it will change how you shop.
Take a piece of A6 card — a scrap of mount board or the back of a cereal packet works fine. Punch or stitch six to eight buttons onto it, spaced out, the ones you're considering or the ones already in your stash. Write the details in pencil underneath: size in millimetres, material if you know it, where it came from.
Now look at the card in three places.
- By a window, mid-morning. North-facing is best; you want light without direct sun. This is your reference point — the colour the button 'really' is.
- Under your usual living-room lamp, after dark. This is the condition it will actually be seen in for the next four months. Sit down, hold the card at chest height, and look at it from a normal sitting distance rather than nose-to-card.
- Beside a string of fairy lights, or under a phone torch set to cool white. Fairy lights are a fair stand-in for the mixed, slightly theatrical lighting of a festive room. The torch is a useful brutal test for cheap coatings — a lot of them fail it.
Add a pencil note on the back of the card for each button: something like day: soft / lamp: yellowing / LED: flat. Keep the card in your notions tin. Next time you're in a shop, you'll know what you're actually buying rather than what the shop lighting is selling.
Before you sew anything on
Once the card is made, take it to the garment. Drape the knit over your arm, hold the card against the button band, and look in a mirror rather than down at your hands — we see our clothes from a distance, in rooms, usually in the evening. If the button disappears at that range, no amount of close-up beauty will save it.
For a festive knit, this test is worth doing twice: once with the room lamp on, once with only the tree lights. It's the difference between a jumper that photographs well and a jumper that gets worn.
A note for anyone selling or photographing makes
If you run a small stall or sell online, photograph every piece twice: once in daylight by a window, once under warm lamplight. The daylight shot tells the truth about colour, which protects you from returns and disappointed messages. The lamplight shot sells the feeling — and in November, feeling is most of the job.
Keep the two sets labelled separately in your phone. It's easy to mix them up at eleven at night when you're uploading, and a listing that shows a sage-green button glowing gold is a listing that will cause you trouble.
The short version
Buy in daylight if you can. Judge at sitting distance, not nose-to-button. Test pearl and metallic finishes under the exact bulb they'll live under. And remember that winter light isn't a flaw to work around — it's the condition your buttons are being made for. Choose for the lamp, and the sunshine will look after itself.