Shank, Rim and Tell: Reading a Button Like a Sewist
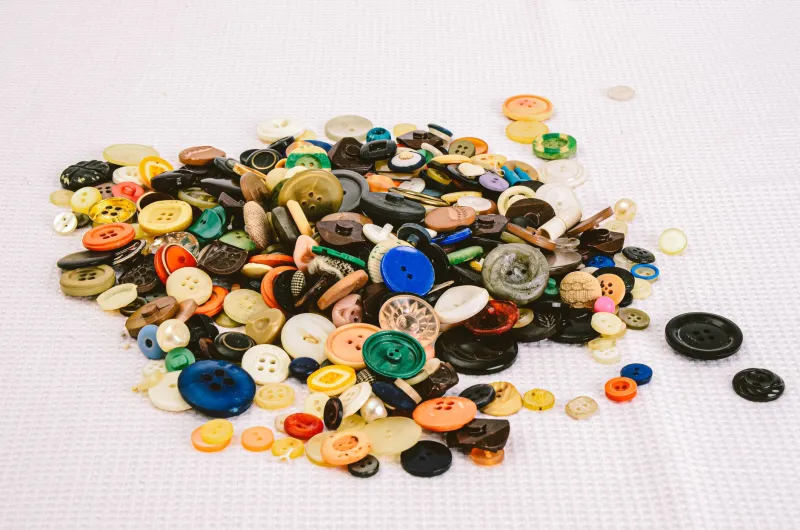
Pick up a button and you are holding a tiny piece of engineering. It may look simple — a disc, a few holes, perhaps a little loop — but every part of its construction is quietly telling you how it wants to be used. At ButtonBox Supplies we spend a lot of time sorting tins and matching odd buttons to projects, and the same lesson comes up again and again: the better you can read a button, the happier the finished make will be.
This is not about being precious. It is about knowing why one button sits beautifully on a wool coat while another disappears into a linen shirt, and why a bargain bag of mixed buttons can be a joy or a frustration. Think of it as learning to listen to the button before you thread your needle.
Begin at the back
The back of a button is often the most honest part. Turn it over and look at how it meets the fabric. A shank is a raised loop, bridge or bar that lifts the button away from the surface. That gap matters. It gives you room for thicker fabric, a folded edge or a buttonhole with a bit of substance. Shanked buttons are the natural choice for coats, jackets, cushions with deep seams, and anything where the button needs to sit proud rather than press into the cloth.
A flat button, sometimes called a sew-through, sits directly against the fabric. Its holes go straight through the face. That close fit is neat and unobtrusive on shirts, blouses, baby knits and lightweight dresses, but it can be less forgiving on bulky fabrics. If you sew a flat button tightly onto thick wool, the fabric may pucker or the thread may strain every time the button is fastened. You can create a thread shank — a wrapped neck of thread beneath the button — to give it breathing room. It is a small, old-fashioned trick that makes a big difference.
Two holes, four holes and the sewing plan
Two-hole buttons are straightforward and secure. They suit small buttons, fine fabrics and simple fastenings, and they let you stitch close to the centre so the button stays put. Four-hole buttons give you more anchor points and more scope for decoration. You can sew parallel bars, a cross, or a square with a centre stitch. The pattern is not just ornamental: it spreads the strain and can help a button sit flatter or stand slightly prouder depending on how you work it.
Before you commit, think about thread. A button is only as strong as the thread that holds it. Use a thread that matches the fabric weight and the button's job. Fine cotton is lovely for a delicate blouse button; a stronger polyester or button thread is better for a coat or a bag. Waxing the thread can reduce tangles and add durability, especially on metal or shell buttons with sharper edges.
Rims, edges and hidden clues
Look at the outer edge. A raised rim can protect the stitching, add strength and catch the light. A bevel or concave face can make a plain button look considered. A self-shank button has its shank moulded as part of the button, often in plastic or resin, and these are common in modern haberdashery. A metal shank button may have a wire loop set into the back; check that the loop is smooth and firmly fixed.
Back marks are the button equivalent of a maker's label. You might find a manufacturer's name, a material description, a size number or a mould line. None of these are a guarantee of quality, but they are clues. A crisp, clean back often suggests a more careful mould; a rough edge or a loose shank is a warning. If you are collecting vintage buttons, back marks can also help you group and identify them, though the main pleasure is still in the look and feel.
Material matters
Plastic and resin buttons are hard-wearing and widely available. They are a sensible everyday choice for shirts, bags and children's clothes. Shell buttons are beautiful and naturally varied, but they can be more brittle, so avoid harsh tumbling or very hot washing. Wood and corozo have a warm, tactile finish; they suit rustic makes, linen aprons and autumn projects. Metal buttons bring weight and character to coats and dungarees, but check for rust if the garment will be washed often. Glass buttons are treasures — lovely on a special piece, less practical for everyday laundering.
The finish matters as much as the material. A glossy button can look smart on a dark fabric; a matte button can soften a bright print. Hold your shortlist against the fabric in daylight, not just under kitchen lighting. Buttons that look right in the shop can turn surprisingly dull or loud once they are next to the cloth.
The swatch test that saves a project
Before you sew a full set, make a small test. Cut a 10 cm square from the same fabric, and add a scrap of interfacing if your garment will use it. Mark where the button will sit. If you can, work a buttonhole on a doubled scrap so you can test the fastening properly. Sew the button with the thread you plan to use, using the same number of stitches you intend for the final make. Fasten and unfasten it ten times, give it a gentle tug, then leave it overnight. If the fabric puckers, the thread frays or the button feels loose, you have learned something cheaply.
For a more thorough test, wash the swatch according to the care you expect the finished item to receive. Let it dry fully and check again. This is especially useful for shell, wood and metal buttons, and for any make that will be gifted or sold. Small creative businesses can keep a simple record card for each fabric and button combination: fabric, interfacing, button size, thread, needle, wash result. It sounds fussy until the first time it saves a batch.
A UK-friendly button glossary
- Shank — a raised loop or bridge on the back of a button that lifts it away from the fabric.
- Flat button / sew-through — a button with holes through the face, sewn directly to the cloth.
- Self-shank — a button whose shank is moulded as part of the button rather than added separately.
- Thread shank — a wrapped neck of thread sewn beneath a flat button to give it room.
- Rim — the raised edge around the face of a button, often adding strength and definition.
- Ligne — a standard button size unit; 1 ligne is about 0.635 mm, so a 24 ligne button is roughly 15 mm across. UK sellers often give both ligne and millimetres.
- Back mark — a maker's name, size or material mark on the reverse of a button.
Choosing with confidence
A good button choice is a small act of matching: fabric weight to shank depth, thread to button weight, finish to the mood of the make. Read the back, check the rim, test the thread and give yourself permission to change your mind before the buttonhole is cut. Whether you are finishing a handmade gift, repairing a favourite coat or preparing a small batch for a market stall, those few minutes of looking closely will show in the finished piece.
And if a singleton button in your tin turns out to be the perfect match for a project, so much the better. The best buttons are not always the ones bought in sets. Sometimes they are the ones that have been waiting patiently for exactly the right cloth.