The Morning Placket: Fastenings That Let Small Hands Get Dressed

Photo: Caroline Martin , CC BY-SA 2.0, via Wikimedia Commons
There is a particular kind of morning chaos that involves one sock, a missing hair bobble and a cardigan button that simply will not behave. Children want to dress themselves. Adults want them to arrive at the school gate with everything roughly where it should be. Fastenings sit right in the middle of that negotiation.
The good news is that button-friendly clothing is not a matter of luck. A few sensible choices about size, height, spacing and reinforcement can turn a fiddly placket into something a small person can manage — and something that survives the coat peg, the PE bag and the biscuit-fuelled dash to the car.
Start with the hand, not the button
A button is only easy if a child can see it, pinch it and push it through. That means thinking about the whole fastening, not just the pretty disc on top.
For most young children, 15mm buttons are a practical minimum. Somewhere around 18–20mm is often the sweet spot for cardigans, pinafores and lightweight coats: big enough to grip, but not so large that the buttonhole becomes a gaping letterbox. Tiny 9–11mm buttons look neat on adult clothes, but they ask a lot of developing pincer grips.
Height matters too. A flat button sitting tight against the fabric is harder to get hold of than one with a little breathing room. Shank buttons, or flat buttons sewn with a thread shank, give small fingers something to hook around. On thick wool, corduroy or layered school uniform, a shank is not a luxury; it is what stops the buttonhole straining and the button pulling tight.
Hole count is a smaller consideration, but two-hole buttons are marginally simpler to orientate and quicker to secure. Four-hole buttons are perfectly fine — just make sure the thread sits neatly and does not create a wobbly button that twists in the buttonhole.
The friendly button checklist
Before you sew anything for a child, give the fastening a quick mental once-over:
- Size: 15mm or larger for everyday dressing; 18–20mm for cardigans and simple coats.
- Shape: rounded rims are kinder than sharp-edged squares or novelty shapes that catch in buttonholes.
- Depth: a buttonhole needs to pass over the button plus its fabric layers. Test with a scrap before committing.
- Grip: a thread shank or built-in shank helps on anything thicker than a cotton shirt.
- Security: buttons on children's clothes should be sewn on to stay on. A loose button is a choking hazard for very young children and a nuisance for older ones.
The buttonhole itself should be generous enough to slide through without a fight, but not so loose that the fastening pops open when a child bends down to pick up a conker. A buttonhole that is just a whisker wider than the button is usually right.
Placement: where small hands actually reach
A beautiful row of buttons down the back is lovely in a photograph and deeply unhelpful at 8.10am. For children who are learning to dress themselves, front fastenings are your friend. If a pattern offers both, choose the front version.
On cardigans and jackets, think about the top button. It is often the hardest one to reach and the least necessary for warmth. A slightly lower neckline, or a design that starts the button row a little further down, can make the whole garment feel more manageable. That does not mean abandoning the top button altogether — just be honest about whether it needs to be part of the morning routine.
Cuffs, collars and pockets are other places where small buttons can become a test of patience. If you are sewing for a child who is still mastering buttons, keep decorative buttons decorative and functional buttons functional. A cuff with one generous button and a roomy loop is kinder than three tiny ones that need a committee meeting to fasten.
For pinafores and dungarees, front strap buttons are much easier than back ones. If the style needs a back fastening, consider adding a ribbon or fabric loop that a child can pull, or keep the back fastening simple and save the button practice for the front.
Reinforcing school uniform without making it look ‘mended’
School uniform takes a beating. Jumpers go on and off over heads, cardigans get stuffed into bags, and pinafore straps are asked to hold up under considerable playground momentum. Factory-sewn buttons are not always given the most generous thread allowance.
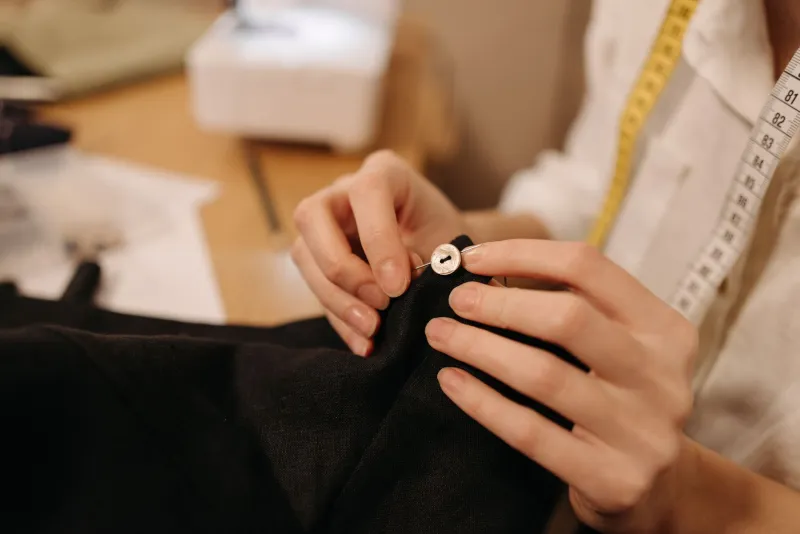
A Sunday-evening check can save a weekday meltdown. Look at every button on the school cardigan or jumper. If one feels loose, secure it before it disappears. Use matching thread, sew through the button holes a few times, then wind the thread around the stitches beneath the button to create a small shank. Finish between the fabric layers and knot firmly. This gives the button room to sit over the buttonhole and reduces strain on the thread.
If a button is very small and the style allows, replacing it with a 15mm version in a similar colour can make a real difference. Keep the original buttons in a small tin or bag in the sewing box, just in case. For pinafores and trousers with adjustable straps, check the buttons and buttonholes at the start of each half-term. A tiny dot of fray-check on the buttonhole edges can help keep them tidy, but always test on a scrap first.
It also helps to keep one spare button in the school bag, secured in a named envelope. Not because you expect disaster, but because small makers and busy parents deserve a backup plan.
Handmade clothes: build in independence
When you are sewing for a child, you have an advantage: you can choose the fastening before the fabric is cut. Look for patterns with a front opening, a roomy placket and button sizes you can easily swap. Interface the button placket so it does not stretch out of shape, especially on jersey or lightweight fabrics. A strip of suitable interfacing gives the buttonhole something firm to grip and helps the buttons stay put through repeated washing.
Always make a test buttonhole on a scrap of the same fabric, with the same interfacing. Check that the chosen button passes through comfortably. If you are using a heavy fabric, sew the button on with a thread shank and consider a small backing button on the inside for extra support. It is a quiet bit of engineering that makes a big difference.
For younger children, avoid decorative buttons that sit where a functional button should be. It is confusing to be told that some buttons are just for looking. Keep the working fastenings obvious and let the decoration live somewhere else — a pocket, a hem, a little embroidered motif.
A practice board that earns its keep
Independence is a skill, and skills need low-stakes practice. A simple button board made from felt or sturdy fabric can be a lovely thing to have in the car, the kitchen drawer or the craft box. Sew a few large buttons onto one piece of fabric and matching buttonholes onto another. Add a loop and a toggle for variety. Let the child practise without the pressure of a school run.
You can also keep an old cardigan in the dressing-up box purely for button practice. It does not need to fit. It just needs buttons that work and buttonholes that are not too tight. A few minutes of play is worth more than a rushed lesson at the front door.
The five-minute Sunday check
Before the week begins, run through the fastenings on the clothes that get the most use: school cardigan, pinafore straps, coat, PE bag. Check for loose thread, wobbly buttons and buttonholes that have stretched. Replace anything that feels unsafe or unreliable. Then put a spare button in the bag and walk away.
The aim is not to make every morning perfect. It is to remove one small obstacle so that a child can say, ‘I did it,’ and mean it. And if the cardigan ends up slightly askew on the way out of the door, that is what the school gate mirror is for.